How to Supplement a Roof Claim: A Step-by-Step Guide for Contractors

Table of Contents
- What It Means to Supplement a Roof Claim
- When to Submit a Roof Supplement — Timing Matters More Than Most Contractors Realize
- The Step-by-Step Process for Supplementing a Roof Claim
- What Happens If the Supplement Is Rejected?
- The Line Items Most Commonly Left Out of Roof Insurance Estimates
- Know When to Handle the Supplement In-House vs. When to Bring in a Specialist
- Frequently Asked Questions
- Final Thoughts: Getting Clarity on Your Roof Claim
Key Takeaways
- Supplements correct gaps, not inflate claims: A roof supplement is a formal request to align the estimate with the documented scope—missing items, accurate quantities, and code-required components.
- Timing changes outcomes: Submitting before tear-off or during tear-off carries far more weight than post-completion supplements, when carriers can no longer inspect active conditions.
- Documentation drives every approval: Tear-off photos, code citations, third-party measurement reports, and current pricing are what move a supplement through review in one cycle instead of weeks.
- F9 notes decide line-item fate: Each added item needs a written justification tied to a documented condition, code requirement, or manufacturer spec.
- Most rejections point to documentation gaps: Review the denial reason, address exactly what was flagged, and resubmit—don’t just send the same file again.
- The most-missed items repeat across claims: Starter course, drip edge, ice and water shield, flashing, decking, O&P, and permit fees are routinely under-scoped in the initial estimate.
The adjuster’s estimate comes in, and the numbers don’t match the reality of the job. Now you’re left deciding whether to absorb the difference, cut scope, or push back. Supplementing is the standard way to close that gap, but in practice, it’s where many claims stall–either skipped or rushed and submitted without the level of detail carriers require.
This guide breaks down how to supplement a roof claim step by step, with a focus on what each stage actually involves and where things commonly go wrong. If you’re seeing gaps between the estimate and the real scope of work, it’s worth understanding why most roof insurance claims require a supplement before moving forward.
What It Means to Supplement a Roof Claim
A roof claim supplement is a formal request for additional funds when the original adjuster’s estimate doesn’t fully cover the documented scope of work. It’s how contractors bring the estimate in line with what the job actually requires once all conditions are known.
This isn’t about inflating a claim or adding unnecessary items. A proper supplement corrects gaps, whether that’s missing line items, inaccurate quantities, or code-required components, so the roof can be restored to its pre-loss condition and meet current building standards.
Supplements are a normal part of the process. Adjusters typically inspect from the exterior and prepare estimates before tear-off, which means they don’t have visibility into hidden conditions like compromised decking or layered systems. They’re also working within time constraints and standard pricing tools. Because of that, initial estimates often reflect what’s visible at the time and not the full scope that emerges during the project.
This guide focuses on residential and light commercial roofing claims, where the supplement process follows a relatively consistent workflow. Larger commercial projects can involve multiple trades and additional layers of documentation, which introduce a different level of complexity. If you’re working across claim types, it helps to understand how to navigate the roofing insurance claims process and the reasons why commercial roof insurance claims are often underpaid.
When to Submit a Roof Supplement — Timing Matters More Than Most Contractors Realize
One of the most common breakdowns in the supplement process (in addition to documentation) is timing. Submitting too late or at the wrong stage of the job can weaken your position and slow approvals, even when the scope is valid.
Before the Job Starts — Reviewing the Estimate Before Tear-Off
The strongest position is before work begins. Reviewing the adjuster’s estimate pre-tear-off gives you the chance to identify gaps while the carrier still has the opportunity to reinspect.
Common red flags at this stage include:
- Measurements that don’t align with the actual roof dimensions
- Missing underlayment, starter, or other code-related components
- No overhead and profit (O&P) where the scope justifies it
Catching these early allows you to raise questions and submit corrections before the project moves forward.
During Tear-Off — When Hidden Conditions Change the Scope
Tear-off is where the scope becomes fully visible. Once the existing roofing system is removed, conditions that couldn’t be seen during the initial inspection come into view, such as damaged sheathing, deteriorated substrate, or compromised deck boards.
This is also the most critical moment for documentation. Every newly discovered condition needs to be photographed clearly and immediately, before any repairs are made. Without that visual record, it becomes much harder to support additional line items later in the process.
After the Job — Submitting Post-Completion Supplements
Some supplements are submitted after the work is complete. While still valid, this is generally the most challenging stage to work from.
At that point, the carrier can no longer inspect active conditions, and decisions rely entirely on the documentation provided. That typically means more scrutiny, longer review times, and a higher burden of proof.
It’s still worth pursuing when needed, but the further along the job is, the more important it is that the documentation is complete and clearly tied to the scope.
The Step-by-Step Process for Supplementing a Roof Claim
Understanding how to supplement a roofing insurance claim starts with knowing that each step builds on the previous one, and small breakdowns early on tend to create delays later. Let’s go over how the process works in practice and where it typically becomes challenging.
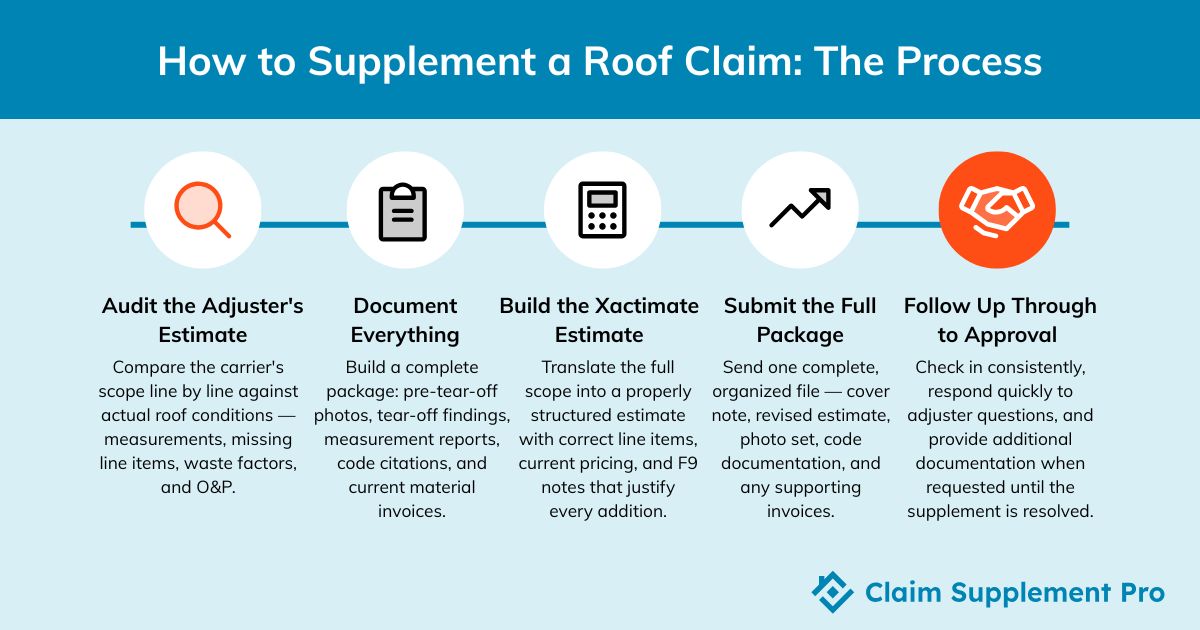
Step 1 — Audit the Adjuster’s Estimate Against the Actual Roof
The process starts with a line-by-line comparison between the carrier’s estimate and the actual roof conditions. This means reviewing the scope against your own inspection findings, and not just visually, but also structurally.
What you’re looking for here:
- Missing line items (drip edge, starter course, flashing, underlayment, ventilation)
- Incorrect measurements that don’t match the roof dimensions
- Waste factors that don’t reflect complexity (valleys, hips, pitch)
- O&P excluded where the scope justifies it
Where this step often breaks down is in translation. Contractors can usually identify what’s missing on-site, but mapping that to the correct Xactimate line items and presenting it in a way the carrier will accept is a different skill set. If it’s not written correctly, it can be denied even when the work is clearly required.
Step 2 — Document Everything That Justifies the Supplement
Once gaps are identified, the next step is building the documentation that supports every added line item. This is where many supplements either gain traction or stall.
A complete documentation package typically includes:
- Pre-tear-off photos showing initial conditions
- Tear-off photos capturing hidden damage (linked to specific line items)
- Measurement reports (EagleView, HOVER, or similar)
- Local building code citations (IRC/IBC where applicable)
- Manufacturer installation requirements
- Material invoices reflecting current pricing
Documentation quality directly affects approval speed. When everything is clear, organized, and tied to the estimate, adjusters can often move through review in a single cycle. When it’s incomplete or scattered, the file goes back and forth–sometimes for weeks.
Experienced supplement specialists also understand how different carriers prefer to receive documentation, which helps reduce friction before the review even starts. Knowing also what contractors should communicate to homeowners before submitting a roof estimate can make a difference for you and the process as a whole at this stage.
Step 3 — Build the Supplemental Estimate in Xactimate
At this stage, everything needs to be translated into a format the carrier can review and process, which means building a properly structured Xactimate estimate.
This is where technical accuracy matters most:
- Correct line item selection
- Proper category placement
- Accurate measurements and quantities
- Current price list alignment
- Clear, detailed F9 notes
F9 notes are often the deciding factor. Each added line item needs a written justification that connects it to the documented condition, code requirement, or manufacturer spec. Without that narrative, even valid items can be questioned or denied.
Xactimate itself is just a tool. If the estimate is built with incorrect line items, outdated pricing, or incomplete notes, the entire supplement loses credibility, even if the underlying scope is legitimate.
For a deeper look at how this works, see our Xactimate estimating guide. And if building estimates in-house is slowing your process, this is where professional estimating services come in to help.
Step 4 — Submit the Package to the Carrier
Once the estimate and documentation are complete, the next step is submission. Most carriers accept supplements via email or through a claims portal, but how the package is presented matters just as much as what’s in it.
A strong submission typically includes:
- A concise cover note explaining what was missed and why the supplement is warranted
- The revised Xactimate estimate
- A complete, organized photo set
- Code documentation and supporting materials
- Any relevant invoices or third-party reports
Disorganized submissions, spread across multiple emails or missing key pieces, slow down the review process. The goal here is clarity: give the adjuster everything they need, in one place, to make a decision.
Tone also plays a role. Communication should stay professional and documentation-driven. The easier it is to follow the logic of the supplement, the easier it is to approve.
Step 5 — Manage Follow-Up and Carrier Communication Through to Approval
Submitting the supplement isn’t the final step—it’s the start of the review phase. Without follow-up, even well-prepared files can sit without action.
Effective follow-up includes:
- Checking in on status at appropriate intervals
- Responding quickly to adjuster questions
- Providing additional documentation when requested
- Keeping communication clear and professional
This is also where the process becomes resource-intensive. Managing ongoing communication with carriers takes time and attention, often pulling contractors away from active jobs and new opportunities. For many teams, this is the point where supplementing in-house becomes difficult to sustain consistently, especially at scale.
What Happens If the Supplement Is Rejected?
A rejected supplement isn’t the end of the process. In most cases, it reflects a gap in documentation or presentation, not necessarily that the scope itself is invalid.
Carriers typically deny or push back on supplements when something is missing or unclear. That could be:
- Insufficient photo documentation
- Missing code references
- No third-party measurement report
- Line items not clearly tied to supporting evidence
The first step is to review the denial carefully. Most responses will point to a specific reason, and that detail matters. Instead of resubmitting the same file, the goal is to address exactly what was flagged.
A stronger resubmission usually includes additional or clearer photos tied to the disputed items, strengthened documentation, and a brief cover note explaining what was added and how it supports the scope.
When the same items are denied again, or the file isn’t moving forward, there are escalation options. Contractors can request a re-inspection, ask for a supervisor review, or, if the situation warrants, move into the appraisal process.
It’s important to recognize when a supplement turns into a broader claim dispute. At that point, the approach may shift beyond documentation and into a formal appeal. All of this is why it’s worth understanding the full process for appealing a denied roof insurance claim.
The Line Items Most Commonly Left Out of Roof Insurance Estimates

Even when a roof replacement is approved, the initial estimate often reflects only the most visible components. The following items are among the most commonly missed or under-scoped:
- Starter course shingles
Often not broken out as a separate line item, even though they’re required at eaves and rakes for proper installation. - Drip edge
Required by code in most areas, but frequently missing from the original scope. - Ice and water shield
Coverage requirements vary by code, and initial estimates don’t always reflect the correct areas or quantities. - Underlayment upgrades
When code or manufacturer specs require a higher-grade product, the estimate may still reflect a basic version. - Flashing (step, counter, chimney)
Commonly under-scoped, especially on complex rooflines where labor and material needs are higher. - Additional layers (tear-off)
Extra labor for multiple roofing layers is often not accounted for in the first estimate. - Decking replacement
Only confirmed during tear-off, which means it won’t appear unless properly documented and supplemented. - Overhead and Profit (O&P)
Frequently excluded in initial estimates, even when the scope involves multiple trades or coordination. - Permit and inspection fees
Required for most roof replacements but not always included in the carrier’s pricing.
These gaps aren’t unusual; they’re a result of limited visibility during the initial inspection. The challenge is making sure each of these items is properly documented and justified when supplementing, so the final scope reflects the actual requirements of the job.
Know When to Handle the Supplement In-House vs. When to Bring in a Specialist
Not every supplement needs to be outsourced. In some cases, experienced contractors can manage the process internally, especially when the scope is straightforward and the estimate only requires minor adjustments. If you’re comfortable working in Xactimate, have a complete and well-organized documentation package, staff time to dedicate to negotiations, and the carrier is responsive, handling the supplement in-house can be a practical option.
When the Supplement Starts Competing With Your Time and Margin
The shift usually isn’t obvious at first. It starts with a few missing line items, then turns into back-and-forth with the carrier, requests for additional documentation, and time spent rewriting or justifying the same items.
At that point, the challenge isn’t just identifying what’s missing, but managing the entire process without it affecting the rest of your business. Follow-ups get delayed, approvals take longer, and your team’s attention is split between the claim and active jobs.
That’s where a specialist can step in and run the supplement process in parallel. At Claim Supplement Pro, the estimate is built in Xactimate, the documentation is structured for review, and carrier communication is handled through to resolution, so your team stays completely focused on their work.
Frequently Asked Questions
How long does a roof supplement take to get approved?
Timelines vary based on the carrier and the quality of the submission. A complete, well-organized supplement submitted to a responsive adjuster can move in as little as 1–2 weeks. When documentation is incomplete or during high-volume periods (like after major storms), timelines can extend to 6–10 weeks or longer. In most cases, delays come from back-and-forth requests, and clear documentation upfront helps reduce those cycles.
Can a contractor submit a supplement without a public adjuster?
Yes. Contractors regularly submit supplements directly to the carrier as part of the standard claims process. A public adjuster is a separate role that represents the policyholder more broadly. Supplement specialists like CSP focus specifically on estimate accuracy, documentation, and carrier-facing submissions.
Is supplementing a roof claim legal?
Yes. Supplementing is a standard and accepted part of the insurance claims process. Initial estimates are often created with limited visibility and under time constraints, so supplements provide a structured way to update the scope once additional information becomes available. The key is that all requests are supported by clear documentation.
What happens if the carrier denies the supplement?
A denial usually points to a gap in documentation rather than a rejection of the scope itself. The next step is to review the reason carefully, address what’s missing, and resubmit with stronger support. If the same items are denied again, contractors can request a re-inspection, escalate within the carrier’s process, or pursue an appraisal if the policy allows.
Do homeowners need to be involved in the supplement process?
In most cases, no. Contractors handle the estimate, documentation, and communication with the carrier. The homeowner may only need to step in for policy-related questions or to provide signatures if required.
Final Thoughts: Getting Clarity on Your Roof Claim
If you’re still deciding whether to handle supplements in-house or bring in support, it’s worth stepping back and looking at the trade-offs in more detail through our guide on In-House vs. Outsourced Claim Supplementing.
When the initial estimate doesn’t match the actual scope of the roof, the next step is simply getting a proper review of what’s missing and what can be supported.
Contact us for a claim review and see how our roofing supplement services process is handled end-to-end.