12 Essential Water Damage Insurance Claim Tips
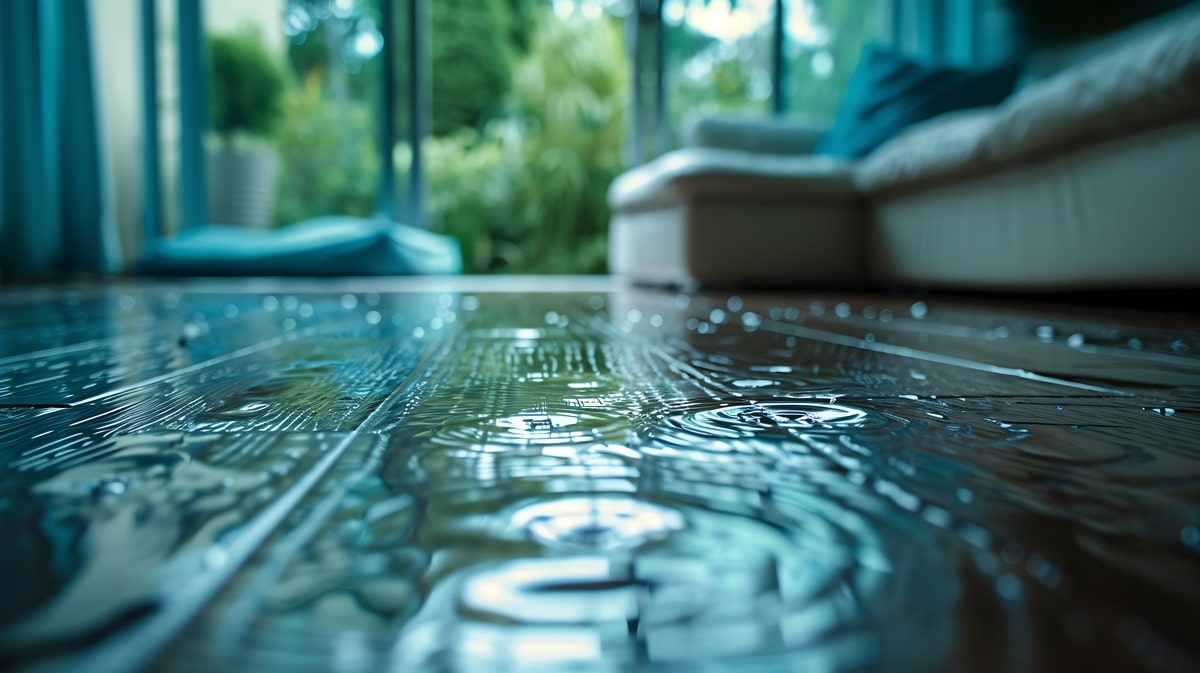
Table of Contents
- Understanding the Water Damage Insurance Claim Process Before You Start
-
12 Water Damage Insurance Claim Tips to Maximize Your Payout
- Tip #1 — Act Fast: Report the Water Damage Immediately
- Tip #2 — Stop the Source and Begin Emergency Mitigation Right Away
- Tip #3 — Document Everything (Photos, Videos, Moisture Readings, List of Damaged Items)
- Tip #4 — Create a Detailed List of Damaged Materials and Contents
- Tip #5 — Don’t Rely on the Insurance Adjuster’s Estimate Alone
- Tip #6 — Hire Technicians Who Understand Insurance Claims
- Tip #7 — Use Industry-Standard Estimating Software
- Tip #8 — Check for Hidden and Secondary Damage (Subfloors, Cabinets, HVAC, Electrical)
- Tip #9 — Understand Your Policy Coverages and Exclusions
- Tip #10 — Avoid Making Common Mistakes That Lead to Underpayment
- Tip #11 — Be Prepared to Challenge the Insurance Adjuster
- Tip #12 — File a Supplement When the Insurance Estimate Is Missing Work
- Know When to Call a Claim Supplement Specialist
- Special Considerations for Commercial Water Damage Claims
- How to Create a Water Damage Insurance Claim List (Step-by-Step)
- When Water Damage Leads to Mold — What You Must Do for Insurance Approval
- When the Insurance Company Underpays or Denies Your Water Damage Claim
- How a Claim Supplement Expert Helps Maximize Your Water Damage Payout
- From Venting to Supplementing — We’re Here to Hear You Out
If there’s one type of property claim that routinely falls short, it’s a water damage insurance claim. These claims are known for being rushed, underpriced, or denied outright, often leaving property owners and restoration teams covering costs the carrier should have paid.
From burst pipes to storm-driven water intrusion, every minute counts… and every mistake costs. That’s why knowing the right water damage insurance claim tips is the only way to avoid losing money.
And because insurance estimates frequently miss critical line items, proper supplementing is a must. Claim Supplement Pro specializes in uncovering those gaps, correcting the scope, and securing the payouts your documentation truly supports.
Understanding the Water Damage Insurance Claim Process Before You Start
A typical water damage claim process includes a predictable path: inspection, mitigation, documentation, estimating, adjuster review, settlement, and often a supplement to correct missed or underpaid items.
One key recommendation is to submit an initial invoice before mitigation is fully complete, as long as it’s clearly labeled as an estimate and understood that it will be finalized later. This gets the claim moving faster and reduces delays caused by late file setup.
Early missteps like poor documentation, slow reporting, or unclear invoicing almost always lead to reduced payouts down the line.
12 Water Damage Insurance Claim Tips to Maximize Your Payout
We want to share water damage insurance claim tips for both property owners and the water mitigation technicians who guide them through the earliest and most critical stages of a loss. Only when the right steps are taken early do claims move fast, documentation is strong, and payouts are accurate. When mistakes happen upfront, thousands can be lost later. Our tips, therefore, focus on protecting your claim from day one.
Tip #1 — Act Fast: Report the Water Damage Immediately
Delays are one of the most common ways for insurers to reduce or deny a claim under “failure to mitigate” arguments. Property owners should notify their insurance carrier within 24 hours, and mitigation specialists should actively reinforce this timing on-site.
Emergency mitigation should begin immediately to stop the spread of damage, but the claim should still be reported right away, as insurers may argue that damage was ongoing due to late reporting.
Tip #2 — Stop the Source and Begin Emergency Mitigation Right Away
Proper emergency mitigation means stopping the water at its source and preventing further damage immediately. This can include active leak stoppage, water extraction, board-up, tarping, and temporary protection of exposed areas. Proper mitigation is essential to prevent all avoidable damage, and it will be a key focus during the adjuster’s review.
Water remediation technicians must document every step since proof protects the full scope of work and directly supports proper reimbursement during claim review and throughout the water and flood supplement process.
Tip #3 — Document Everything (Photos, Videos, Moisture Readings, List of Damaged Items)
There can’t be too much emphasis on strong documentation; it is the foundation of every successful water damage claim. Capture before, during, and after photos using both wide and close-up angles, always with clear timestamps. Short videos further help show active water flow and the true extent of damage in ways that photos alone can’t.
Moisture mapping and thermal imaging should be used to prove what the eye can’t see when it comes to interior damage documentation. These readings justify drying time, equipment usage, and removal scopes.
Every property owner and mitigation specialist should also keep a detailed water damage insurance claim list of all affected materials, contents, and systems. This list becomes a critical tool when estimates are reviewed or challenged.
Tip #4 — Create a Detailed List of Damaged Materials and Contents
Insurance adjusters can easily miss hidden or secondary damage at first sight, so a thorough itemized inventory is essential. List every affected material and content, including quantities, types, and specific details (e.g., brand, model, age).
Don’t forget to cover both structural components, like drywall, insulation, flooring, and personal contents, such as furniture, electronics, and appliances. A detailed list is another important aspect of supporting supplements and ensuring no legitimate repair or replacement stays overlooked.
Tip #5 — Don’t Rely on the Insurance Adjuster’s Estimate Alone
Insurance adjuster initial estimates often underrepresent the full scope of water damage repairs. The assigned adjuster may not be a mitigation specialist, so items like drywall removal, insulation replacement, flooring, cabinets, electrical work, and plumbing can get overlooked. Adjusters may also miss necessary code upgrades or proper drying times, which can lead to underpayment.
Because of these gaps, submitting a supplement is often necessary to ensure full coverage. Working with experts who provide professional estimating services can help you capture all legitimate costs.
Tip #6 — Hire Technicians Who Understand Insurance Claims
Working with restoration technicians experienced in insurance claims is your shortcut to every repair being properly documented and submitted. These professionals know how to challenge adjuster findings when legitimate damage is missed and can provide detailed line-item estimates that support a stronger payout.
Homeowners should look for technicians who are familiar with water damage claim supplements and understand the importance of accurate scopes, detailed documentation, and compliance with insurer requirements.
Tip #7 — Use Industry-Standard Estimating Software
Carrier-compliant estimating software is essential for ensuring your water damage claim captures every legitimate cost. Insurance adjuster estimates can contain missing line items or inaccurate pricing, which reduce your payout if unchallenged.
Mitigation specialists should generate their own estimate using industry-standard software to compare against the insurer’s figures, highlighting overlooked or underpriced items. This professional, software-backed documentation that we can help you with strengthens your claim, supports supplements when necessary, and helps secure a full reimbursement.
Tip #8 — Check for Hidden and Secondary Damage (Subfloors, Cabinets, HVAC, Electrical)
Water often travels to areas that aren’t immediately visible, creating hidden or secondary damage that can be easily overlooked during an initial inspection. Subfloors, cabinetry, HVAC systems, and electrical components are common areas where moisture can linger, leading to long-term issues if not properly addressed.
Using moisture mapping, thermal imaging, and selective destructive testing (where allowed) helps uncover these hidden problems and accurately documents the full scope of the loss. Thorough assessment of these areas also supports claims related to mold or other post-water damage concerns, ensuring your estimate fully reflects all necessary repairs.
Tip #9 — Understand Your Policy Coverages and Exclusions
A clear understanding of your insurance policy is critical for navigating your water damage claim. Most policies cover sudden and accidental discharges, storm-related intrusion, appliance failures, and burst pipes, but exclusions commonly apply to groundwater seepage, sewer backups (unless specifically endorsed), and damage from repeated leaks over time.
Knowing your coverage limits for mitigation, additional living expenses (ALE), and mold-related repairs helps set realistic expectations and ensures all eligible costs are properly documented. Being familiar with these details also makes it easier to anticipate challenges and avoid common reasons water claims are denied.
Tip #10 — Avoid Making Common Mistakes That Lead to Underpayment
Many water damage claims suffer reduced payouts due to preventable errors; don’t let yours be one of them. Common mistakes include failing to document damage early, removing or discarding materials before photographing them, not saving receipts for emergency repairs or mitigation, and allowing adjusters to rush inspections without proper oversight.
Following careful procedures and keeping thorough records is what maximizes your recovery. For property owners and restoration professionals seeking guidance, adhering to insurance claims water damage advice ensures every legitimate cost is captured and supports a smoother claims process.
Tip #11 — Be Prepared to Challenge the Insurance Adjuster
If the initial estimate comes in low, you have the right to respectfully dispute it with clear documentation and professional support. Common under-scoped items include limited drywall removal, missing insulation replacement, insufficient drying time, overlooked cabinetry, flooring transitions, and code-required upgrades.
These gaps should be addressed with photos, moisture readings, compliance documentation, and an itemized technician estimate. Policyholders and restoration technicians can also request managerial review to formally challenge omissions and pricing errors.
Tip #12 — File a Supplement When the Insurance Estimate Is Missing Work
A claim supplement is a formal request to correct missing, under-scoped, or underpriced work in the insurer’s original estimate, and insurers fully expect this process when errors or new loss information emerge. Common supplementable items include code compliance upgrades, mismeasured quantities, and excluded but necessary line items required for proper mitigation.
Mitigation specialists play a critical role by supplying updated documentation, detailed line-item estimates, photo evidence, and technical justification to support these corrections. A well-supported supplement leads to the final settlement that accurately reflects the true scope and cost of the water damage.
Know When to Call a Claim Supplement Specialist

Some water damage claims hit a ceiling early. It can be due to a light initial estimate, a denial that doesn’t match the facts, or mitigation work that wasn’t fully accounted for. When that happens, bringing in a supplement specialist is your ace in the hole for getting the scope your project truly requires.
A supplement expert reviews your documentation, extraction costs, and mitigation records with a fine-tooth comb, then translates that evidence into carrier-compliant estimates that withstand scrutiny. Whether you’re dealing with an underpaid scope, a mold-related add-on that needs justification, or simply a claim that doesn’t look as big on paper as it really is, this is the point where having Claim Supplement Pro in your corner can shift the entire outcome.
Special Considerations for Commercial Water Damage Claims
Commercial water losses come with a different set of expectations and much higher stakes than residential claims. The structures are larger, the systems more complex, and the documentation requirements far more demanding.
Beyond the physical repairs, commercial properties often face operational disruptions, which means timelines, safety requirements, and access restrictions all shape how the claim must be handled. In these cases, water mitigation technicians and property managers need airtight evidence: detailed moisture mapping, floor-by-floor documentation, and equipment logs, in order for clear tracking of how the damage impacts business operations to take place.
Getting these pieces right from the start helps ensure the claim reflects the true scope of the loss instead of just what’s visible on the surface.
How to Create a Water Damage Insurance Claim List (Step-by-Step)
A water damage insurance claim list helps your insurer verify losses quickly and accurately. Follow our steps to create a complete, well-organized inventory of all damaged items and structural components:

1. Document Everything First
Take clear photos and videos of each damaged item, room, and structural surface before moving anything. Capture close-ups, wide angles, and serial numbers where visible.
2. Create an Itemized Inventory List
List every affected item in a spreadsheet or template. For each entry, include:
- Item name
- SKU or serial number (if applicable)
- Brand and model
- Material type
- Approximate age
- Original cost
- Estimated replacement cost
3. Add Structural and Building Materials
Include building components such as flooring, drywall, insulation, cabinetry, trim, and fixtures. For each material, note:
- Type (e.g., hardwood, laminate, PVC pipe, drywall thickness)
- Brand (if known)
- Installation year or approximate age
- Square footage or quantities needing replacement
4. Separate Salvageable vs. Total Loss Items
Categorize your list into:
- Fully damaged / non-restorable
- Partially damaged
- Undamaged but moved or affected
5. Attach Supporting Documentation
Whenever possible, include:
- Receipts or invoices
- Warranty information
- Photos of the item before damage (if available)
- Online price references for replacements
6. Review and Finalize
Confirm accuracy, group items by room, and ensure nothing is missing. Submit the list along with your photos and estimates to streamline your claim.
When Water Damage Leads to Mold — What You Must Do for Insurance Approval
Mold can begin developing within 24-48 hours after water intrusion, so insurers expect homeowners and businesses to take immediate mitigation steps, including drying, dehumidification, and removing saturated materials. Delays can lead to denied or reduced coverage.
Most policies include strict caps on mold remediation, often limiting coverage to a specific dollar amount regardless of the total damage. Because mold spreads into wall cavities, insulation, framing, and flooring, the full scope is rarely visible during the first inspection. That’s why mold-related work often requires a supplement, submitted once hidden growth is discovered during demolition.
When the Insurance Company Underpays or Denies Your Water Damage Claim
It’s common and reasonable for early estimates to fall short. Adjusters may miss hidden moisture and damage in ways that reduce the initial payout. Other times, a water claim may be denied because key documentation was missing or the cause of loss wasn’t clearly established.
Underpaid water claims with underscoped line items and incomplete measurements are also frequent reasons people seek help. When any of these situations arise, don’t forget that you still have options. Updating documentation, submitting photos and moisture logs, gathering estimates, and preparing a supplement can help correct the scope and bring the estimate in line with the actual damage.
How a Claim Supplement Expert Helps Maximize Your Water Damage Payout
A third-party supplement specialist can make this process far more effective. Professionals will review the initial estimate line by line, identify missing or undervalued items, gather carrier-compliant documentation, and prepare corrected scopes that reflect the real cost of restoring the property. Experience also helps navigate negotiations and communicate with carriers in a way that speeds up approvals and reduces back-and-forth.
Claim Supplement Pro is here to provide you with confidence that nothing has been overlooked and that the final payout accurately represents the full restoration needs.
From Venting to Supplementing — We’re Here to Hear You Out
Handling a water damage claim is all about accuracy, timing, and teamwork.
When you document early, mitigate correctly, keep detailed records, and partner with specialists who understand the claims process, you protect your payout and avoid preventable disputes with the carrier. And if the estimate still comes in low, or if mold, hidden damage, or code requirements complicate the scope, supplementing becomes essential to securing the full amount needed for proper restoration. The water damage insurance claim tips from this guide will help you ensure every part of your loss is supported.
If you believe your water damage claim was underpaid or denied, Claim Supplement Pro is here to help. Reach out for a professional review and let our team assess the documentation, correct the estimate, and advocate for the payout you’re owed.